

Why Protecting Your Belongings Matters Before Any Renovation
Home restoration is always stressful, especially when it comes to keeping your interior intact. Even the most careful contractor is not immune to an accidental paint splash, a dropped tool, or a chunk of plaster falling off the wall. That is why thinking through the protection of furniture and other items in your home ahead of time is not a luxury — it is a necessary part of preparation.
In Carlsbad, where many homeowners deal with renovations tied to water damage, fire recovery, or simply updating an older coastal property, the question comes up every time: where do you put your things while the work is happening? Furniture does not just get in the way of the crew — it risks being damaged or covered in dust throughout the process.
What to Remove From the Work Zone First
Before the crew starts cutting into walls, you have a narrow window to save the most valuable items. The first things to get out of the renovation zone are documents. Passports, titles, contracts, diplomas. These papers cannot be replaced. It is better to remove them from the home entirely — to your office, to a relative's house, or to a secure storage unit.
The second priority is electronics. Laptops, tablets, televisions, speakers. Everything that is sensitive to dust and impact. Construction dust is a killer of electronics: it clogs ports, settles on circuit boards, causes overheating and short circuits.
Third — clothing and textiles. If you leave closets in the renovation zone, even tightly shut, the dust will still find its way inside. Pull everything out, pack it in vacuum bags or plastic bins with lids, and move it somewhere safe. The same goes for bedding, towels, and blankets.
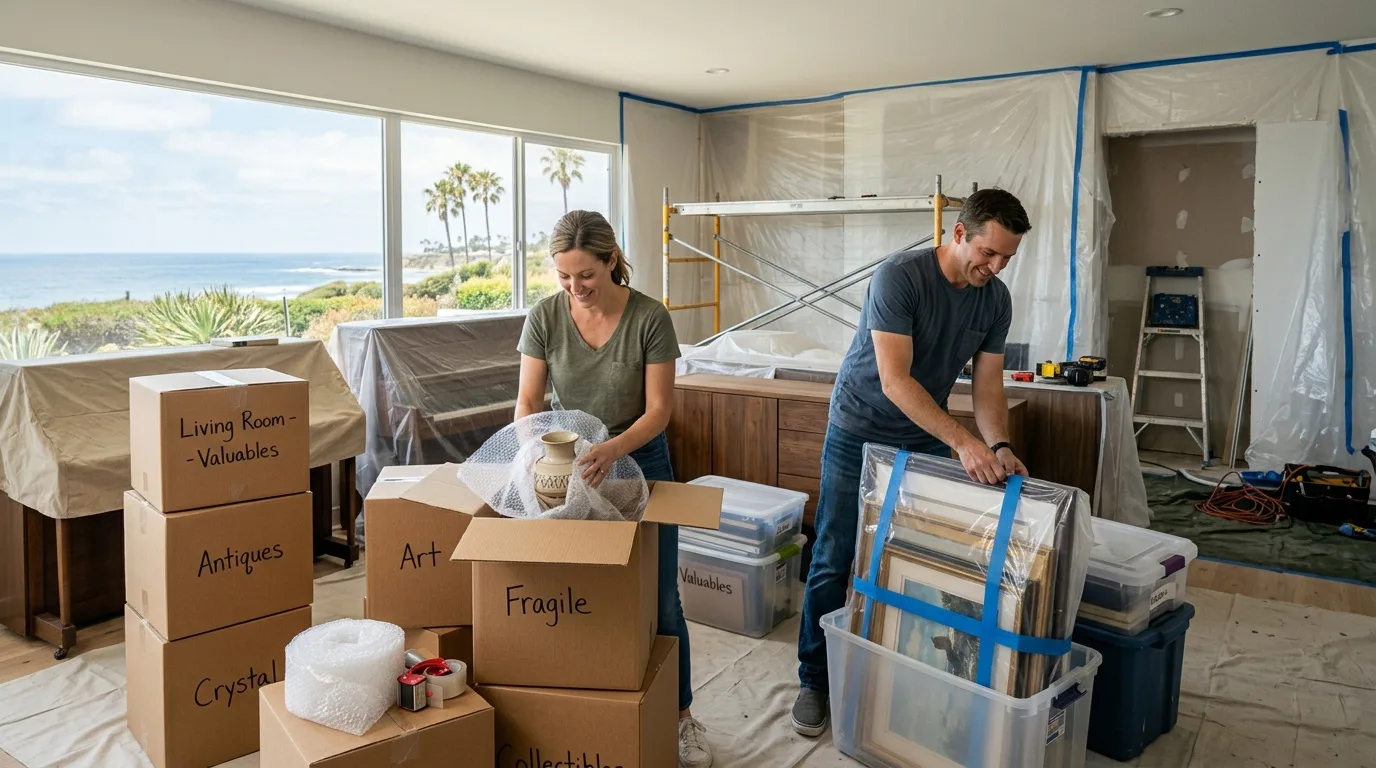
Fourth — fragile and valuable items. Dishes, mirrors, paintings, figurines. Anything that can break from the vibration of a hammer drill or an accidental bump. Wrap it in bubble wrap and cardboard boxes, and get it out of the danger zone.
Fifth — furniture you care about. If you have the option, move expensive furniture out of the house for the duration of the dirtiest stages of work. If that is not possible, push it to the center of the room and cover it with thick plastic sheeting in several layers.
Choosing the Right Protective Materials
Polyethylene film is the most common option. It is inexpensive, unrolls easily, and provides good protection from moisture and paint. However, thin film — less than 50 microns — can tear on contact with sharp objects or tools. It is better to choose a dense polyethylene film with a thickness of 80 to 120 microns. It holds up under load and does not rip when furniture is moved around.
Covering material made from cardboard or nonwoven fabric is more reliable but costs more. These materials absorb impacts well, do not slide, and do not generate static electricity that attracts dust. They work particularly well for upholstered furniture — sofas, armchairs, ottomans.
Corrugated cardboard is a good solution for protecting corners, table legs, or side panels of cabinets. It can be used as an additional layer under film or as a standalone shield against falling debris.
Regardless of the material you choose, secure it with painter's tape or paper-based adhesive tape. Regular clear tape can leave marks on wood or laminate, especially if left on for an extended period.
How to Protect Different Parts of the Home
Floors
The floor is one of the most vulnerable surfaces. It catches not just dust but paint drips, cement residue, and leftover tile adhesive. Simply laying down film is not enough. Underneath it, place cardboard, old sheets, or a dedicated covering material. For laminate, hardwood, or tile, a two-layer approach works best: first cardboard or nonwoven material, then dense polyethylene film on top.
Windows
Glass and window frames scratch easily during wallpaper removal or wall sanding. Cover them with clear film or protective material. If you plan on painting the window trim, cover the glass entirely, leaving only ventilation gaps.
Doors
Interior doors often take hits and get splashed. You can wrap them in film, but it is better to use dedicated protective covers or makeshift wraps made from cardboard and film. Hinges and locks should be covered separately. If possible, temporarily remove the door from its hinges and store it elsewhere. That is the most reliable way to avoid damage.
Plumbing
Bathtubs and sinks should be wrapped in film and then covered with a double layer of cardboard. Faucets are best removed entirely or wrapped in cling film. It is especially important to cover drain openings — construction debris and dust get into them easily and cause clogs later. And one critical rule: do not let the crew wash their tools in the bathroom fixtures.
Separating the Construction Zone From Living Space
If the renovation is not happening in the entire home at once but in stages, you need to physically separate the living area from the work area. This is not a matter of comfort — it is a matter of health. Construction dust contains silica, cement particles, and chemical residue. Breathing this in over weeks is harmful.
The best option is a temporary barrier made of drywall or dense film with a sealed zipper closure. It isolates dust, noise, and odors. If that is not possible, heavy curtains or room dividers help, but keep in mind: they do not stop fine particulate dust.
In the living zone, maintain cleanliness. Every day — wet cleaning. A vacuum with a HEPA filter, a rag, a bucket of water. Do not smear the dust around; wash it off. And make sure to change clothes and shoes at the boundary between zones. You should have designated footwear for the dirty zone and clean ones for the living area.
Where to Store Things If There Is No Room at Home
At a certain point you realize: there are too many things. They do not fit in any one room, they are in the crew's way, and they are at risk of getting ruined. And here the question comes up: where do you put them?
For Carlsbad homeowners, there are several options, each with its own trade-offs.
Garage
This works if you have an alternative parking arrangement. The downside is that temperature swings and coastal humidity can cause items to absorb moisture and pick up odors. Carlsbad's proximity to the ocean means garage storage is not ideal for anything sensitive to dampness.
A Relative's or Friend's House
Safe enough, but it requires organizing transport, which means extra costs for a truck and movers. And it puts a burden on your relationship if the timeline stretches.
A Storage Unit or Individual Box
A reliable lockable space with personal access. The downside is that you pay for the entire volume of the unit, which may mean overpaying for space you do not use. A climate-controlled unit is the better choice — stable temperature, dry air, and insurance on the stored property. You move everything you do not need right now, and after the restoration is done, you bring it back at your own pace.
Professional Pack-Out Services
For homeowners going through restoration after water damage or fire, a professional pack-out is often the most practical route. A crew comes in, inventories your belongings, packs everything with appropriate materials, transports it to a climate-controlled facility, and returns it when the work is finished. This takes the logistics off your plate entirely and reduces the risk of items being damaged during a chaotic self-move.
Practical Tips That Make a Difference
- Remove everything unnecessary from the work zone. The fewer objects in the room, the easier it is for the crew to work and the lower the risk of accidental damage. Small items, decor, and books should go into boxes and leave the space.
- Do not skimp on film thickness. Film at 30 microns is a single-use option at best. For serious renovation work, you need 80 microns and above.
- Use layered protection. Cardboard first, then film on top. This combination works better than either material on its own.
- Seal ventilation openings. Dust gets into places where you would not expect it. Tape over vent grilles with painter's tape or temporary plugs.
- Do not forget appliances. Refrigerators, washing machines, and televisions all need covering. Dense nonwoven material is better than film for appliances, since film traps moisture and can cause condensation.
- Cover drains and sinks. Construction debris in plumbing lines means expensive repairs after the renovation is done.
- Photograph the interior before work begins. This documents the original condition of furniture and surfaces — useful if there is a dispute with the contractor about damages.
- Plan the order of work. Do the dirtiest stages first — demolition, plastering, spackling. Then move to finish work. This reduces the amount of dust during the final phases.
What Happens If You Skip the Preparation
The temptation is to just get started and deal with the mess afterward. But here is what actually happens: paint lands on the sofa fabric and does not come out. Cement dust settles inside the television's vents and shortens its life. A dropped bucket scratches the hardwood. A drill bit punches through a wall and nicks the dresser on the other side. Each of these is a small disaster that costs money and nerves to fix — and most of them are preventable with an hour of preparation.
For Carlsbad homeowners dealing with restoration after water or fire damage, the stakes are even higher. Your belongings have already been through one damaging event. Exposing them to a second round of risk during the restoration itself defeats the purpose. Proper packing, covering, or removal before work begins is not optional — it is part of the recovery process.
Wrapping Up
Protecting furniture and belongings during home restoration is not wasted time or money — it is a reasonable investment in keeping your property intact. The right materials and a thought-through approach let you avoid dozens of small damages that are difficult or impossible to fix afterward. Start with the most valuable and fragile items, work outward, use layered protection for everything that stays, and consider off-site storage or a professional pack-out for anything you cannot adequately protect in place.